Attendance > Detail
The Attendance > Detail page of KinderConnect allows the user to enter, submit and review details of the records of attendance or hours of care for children at the selected Provider. It is also used to record Absences and Holidays.
- Select the Attendance activity from the Navigation Bar.
- Open the Detail page. Depending on your Operator type or previous selection, the Provider field may be populated.
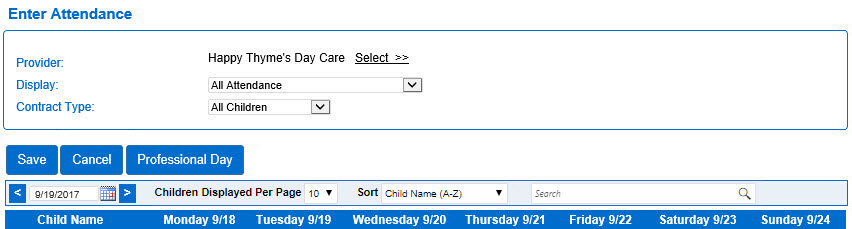
- If not, press Select >> to enter the criteria to search for a Provider. The more criteria you add, the more specific the results of your search will be.
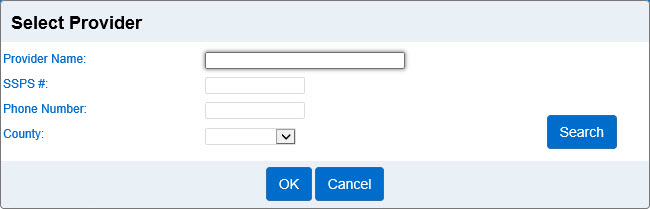
- Once you select the Provider, enter the required information into the remaining fields and press Search to generate results. If the Provider serves children in more than one County, press the drop-down arrow to select the corresponding County and repeat as necessary. The system generates results based on the criteria entered. The example below displays all providers whose name start with "H."
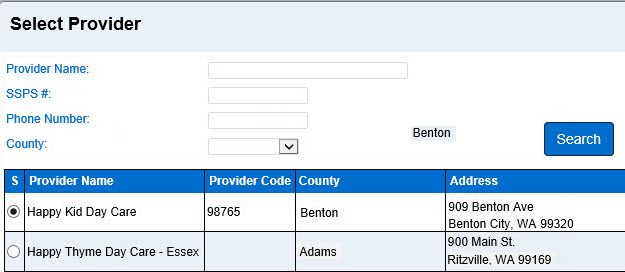
- The system generates results based on the criteria entered. The example above displays all providers whose name start with "H."
- Click on the radio button next to the name of the desired Provider, then press OK to open a list of all Children authorized for care at that Provider during the week the selected date corresponds with.
- Note that the system defaults to the period corresponding to the current date. To modify, just type the desired date, click < or >, or use the Calendar button to select. The Operator can select the number of children to display per page by pressing on the Children Displayed Per Page drop-down arrow.
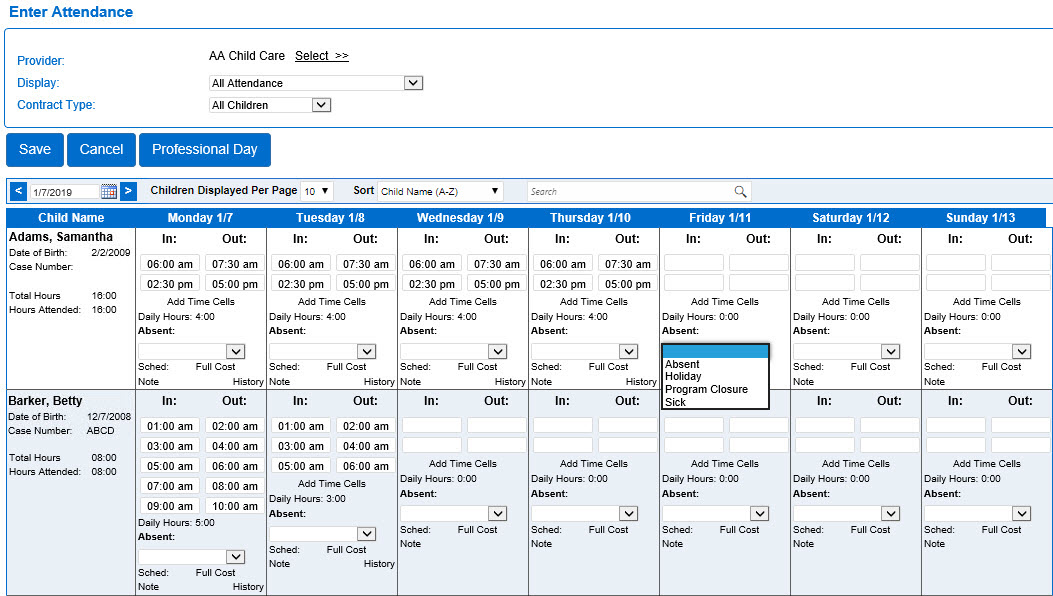
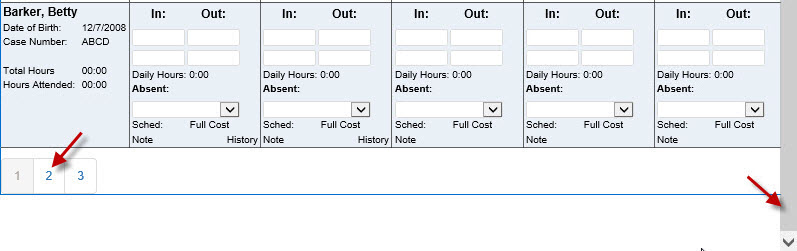
- The table displays the names of the Children and provides spaces to enter the In and Out times as well as to log Absences during that period, . The scroll bar on the right of the table allows you to move through the list of children in that page. Depending on the number of children at the Provider, there might be several pages to enter attendance. In that case, move among the pages by pressing on the appropriate page number link.
If entering attendance for a specific child, you can enter the name of the child or the case number in the Search field and press the icon to access. It is possible to list the children in a specific order by pressing the Sort drop-down arrow and selecting the order you would like the names to appear: Alphabetically or by age.

- The Child's authorized Schedule and the permissions associated with the Provider user type determine the dates for which providers can edit Attendance. The system uses color backgrounds on the cells:
- White cells indicate that the Child is authorized to receive care on that day, and the Provider can enter or edit attendance. However, please note that every other white row of child names is shaded in light blue for viewing ease only. The light blue color may be overridden for individual days by other colors such as red or yellow.
- Gray cells indicate that the date is not authorized or that it is not within the authorization period, thus the Provider is not able to enter or edit Attendance.
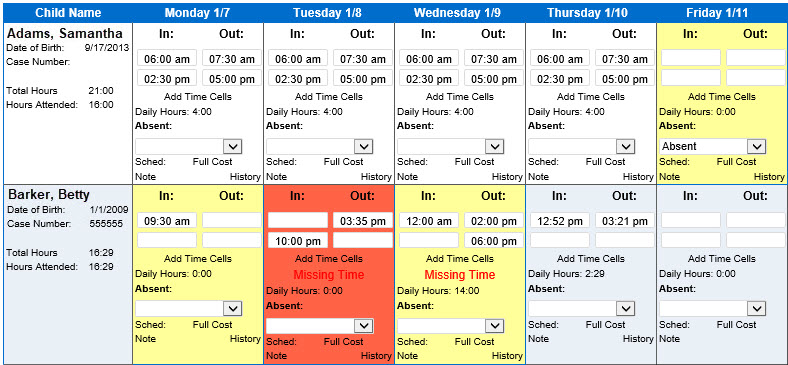
- Yellow cells, after entering attendance, indicate missing information or that the In or Out time pairs are incomplete. The Operator needs to review and correct the discrepancy.
- Red cells, after entering attendance, indicate an error such as incorrect information. The Operator needs to review and correct in order to proceed.
- Dark blue cells indicate that the Attendance has already been submitted.
- A blue background in the time field indicates that a Sponsor entered the attendance or that the attendance has been approved by a Sponsor.
- A white background in the time field indicates that a Provider entered the attendance.
- Note that the system shows Missing Time on incomplete Attendance entries.
- For every day, there are two sets of In and Out times. Use this to record arrival and departure times for children that leave the Provider facility for any reason during the day, whether of school age and the Provider drops/picks up from school, or if checked out of care for a few hours (i.e. doctor appointment). Click on Add Time Cells if you need additional time pairs to enter In and Out attendance times.
- Enter the In and Out times in pairs. The example above reflects a school-age child that is dropped off by the Sponsor at 6:00am, the Provider checks out to take to school at 7:30am, then checks in upon return from school at 2:30pm, and the parent picks up at 5:00pm. The system automatically reformats certain attendance records: If you type "7a," the system will convert it to 7:00am.
- Attendance that spans past midnight can be entered on consecutive days. When KinderConnect detects that an unmatched In time occurs on the first day and that an Out time is the first attendance transaction on the next day, it considers the two transactions a valid time pair and automatically inserts an Out time at 11:59pm on the first day and an In time at 12:00am on the next day. If the attendance covers consecutive days of care, the system automatically enters the In and Out times for the days in between.
- If the Child is Absent, depending on the settings, it might still be necessary to enter the In and Out regular times, then press the drop-down arrow to select the reason for the Absent day.
- When present and if applicable, check the Transportation box to indicate that there is a transportation fee involved.
- Click Note to write a note to be submitted with the Child's Attendance record.
-
Press Save. It is very important to Save the Attendance page before moving to another week.

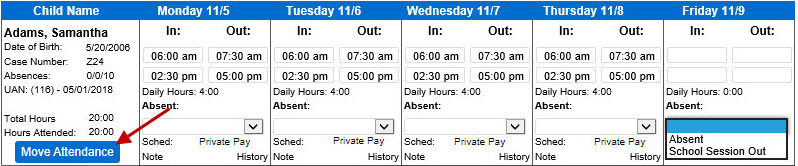
- After saving an Attendance record, the system displays the Total Hours, Hours Attended and Hours Absent for the week in the left column. Under every day, it indicates the corresponding Daily Hours of care. It also activates the History button.
- Press History to view details of the Attendance record for this Child at this Provider.
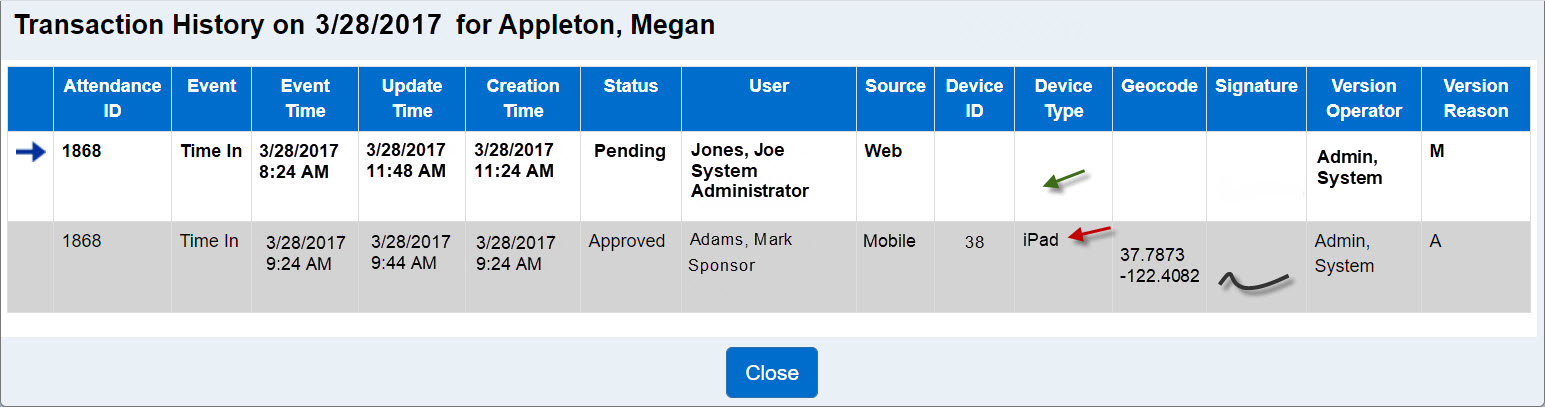
- In the History screen above, you can see the original transaction done by a Sponsor, Mark Adams, using an iPad to check in the child Megan Appleton at 9:24am on 3/28/2017 (gray bar indicated by red arrow).
- Then the system administrator, Joe Jones, updated the record at 11:24am on 9/20/2017, changing the check in to 3/28/2017 at 8:24am (white bar indicated by green arrow).
- Transactions that were obsoleted now appear with a gray background, while the current active transaction has a white background and a blue arrow pointing to it in the left column. The user can always see what information was there before (gray) and what is there now (white).
Move Attendance
There are instances when a subsidized child's authorization ends and the child is waiting for a new authorization. The Provider can add a Private Pay schedule on the Subsidized child record to continue tracking attendance. The Provider can use the Move Attendance button to transfer the valid hours tracked for the child to the new schedule. Once the child's Private Pay attendance is moved, the attendance disappears from the Private Pay child record and only appears under the Subsidized child record. The Move Attendance button is no longer available.
- Press Move Attendance.
- Click on the checkbox(es) corresponding to the days you would like to move the attendance to select.
- Press the drop-down arrow to select the name of the Child you would like to move the Attendance to.
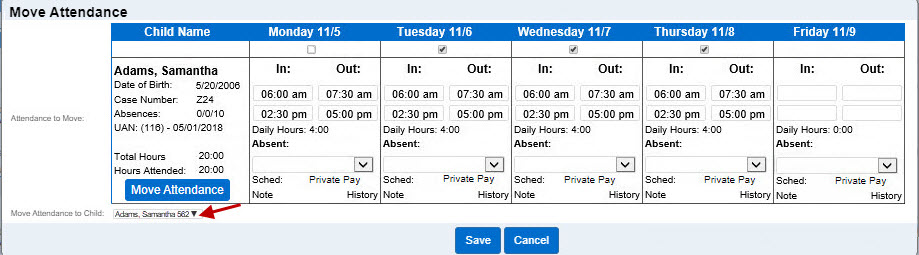
- Press Save.
- KinderConnect returns to the Attendance Detail page. If the Move Attendance button appears, it indicates that there is more attendance that can be moved.
- Select the week you would like to transfer attendance. Repeat the steps above as many times as necessary.
- Once all Attendance eligible to be moved has been transferred, the Move Attendance button is no longer available.